A well-maintained suspension system is essential for ride comfort, handling, and safety. Even without professional tools, you can perform a thorough visual and tactile inspection to catch early signs of wear. Here’s a comprehensive guide to inspecting your suspension at home — with checklists, tables, and practical tips. And if you find worn components, you can Buy Suspension online to restore ride quality and safety.
What You’ll Need
| Tool / Item | Purpose |
|---|---|
| Flashlight | Illuminates dark areas |
| Jack & Jack Stands | Safely lift and support the vehicle |
| Pry Bar or Long Screwdriver | Check for play in joints |
| Rubber Mallet (optional) | Tap to detect looseness or wear |
| Gloves & Safety Goggles | Protection while working |
1. Visual Inspection from the Outside
Before lifting the car, walk around it and inspect accessible suspension parts. Look for:
-
Leaking shock absorbers or struts – oil leaks indicate seal failure.
-
Cracked, torn, or hard bushings – rubber components should be flexible.
-
Rust or corrosion on mounts, springs, and linkages.
-
Sagging ride height – one side of the car sits noticeably lower.
-
Uneven tire wear – indicates misalignment or worn suspension parts.
Mark areas of concern with chalk or tape for further inspection later.
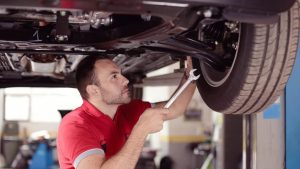
2. Inspecting Underneath the Vehicle
Step-by-step routine while car is safely supported on stands:
-
Check Shock Absorbers/Struts
-
Look for oil leaks along the body and piston rod.
-
Push down on one corner of the car; it should rebound once, not bounce.
-
Use a pry bar to check for play in the top strut mount.
-
-
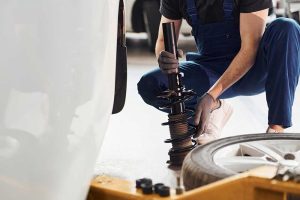
Inspect Springs
-
Ensure coil springs aren’t cracked, broken, or misaligned.
-
Confirm springs sit squarely on their seats without unusual gaps.
-
-
Examine Bushings & Joints
-
Vibrate control arms and sway bar with a pry bar.
-
Any play or click indicates worn bushings or ball joints.
-
Inspect rubber bushings on mounts — they should not be missing chunks.
-
-
Test Stabilizer (Sway) Bar & Links
-
Shake sway bar end links — should move slightly, but no play or noise.
-
Bushings under the bar must be snug, not loose or cracked.
-
-
Check Ball Joints & Tie Rods
-
Lift the wheel slightly and rock it; movement may signify worn joints.
-
Noisy or loose, these pose a serious safety risk.
-
3. Bounce Test (Without Jack)
-
With the car parked, bounce each corner firmly:
-
Good suspension: one bounce, then return to level.
-
Worn shocks or struts: continued bouncing.
-
This easy test helps you assess shock damping performance.
4. Driving Signs to Detect Suspension Issues
| Symptom | Likely Cause(s) |
|---|---|
| Excessive body roll in turns | Weak sway bar, worn shocks |
| Nose dive on braking | Worn front struts or springs |
| Vehicle leans under acceleration | Rear suspension wear |
| Clunking over potholes | Loose bushings or shocks |
| Creaking over bumps | Dry or cracked bushings |
| Pulling to one side | Misaligned or bent components |
Tip: Test drive on quiet back roads to isolate specific noises or reactions.
5. Detailed Checklists
Before Jacking Up:
-
Tires: even wear, proper inflation
-
Shock bodies: clean and intact
-
Springs: visually intact
With Wheels Off:
-
Strut mounts and piston rods
-
Control arm and sway bar bushings
-
Ball joints and tie rod ends
-
Shock absorber and spring seating
6. Safety First
-
Use stable jack stands — never rely solely on a jack.
-
Work on level ground and wear protective gear.
-
If parts seem severely worn or unsafe, schedule professional replacement.
7. When to Replace Suspension Parts
Signs you’ve hit end-of-life :
-
Leaking struts or oil-stained tubes.
-
Broken or sagging springs.
-
Play in any joint or link.
-
Cracked bushings or welded-up brackets dampens performance.
-
Abnormal noises that persist after lubrication.
Replacement Strategy:
-
Replace components in pairs (front or rear).
-
Also replace related items like bushings and sway links.
-
After replacement, get an alignment for handling and tire longevity.
8. Restore Your Suspension
Ready for new parts? You can Buy Suspension online for quality shocks, struts, springs, bushings, end-links, and more.
Summary
Doing a DIY suspension inspection requires just basic tools and observant eyes. Pay attention to:
-
Leaks in shocks/struts
-
Bushing integrity
-
Joint tightness and play
-
Spring condition
-
Handling and ride quality during test drives
Catch issues early and fix them before they affect safety or performance. And if anything’s worn, you now know exactly where to find reliable suspension parts to restore your vehicle’s stability and comfort.
Your ride — and your safety — depend on it!